How to Enable VoLTE and VoWiFi on any OnePlus Device [No Root]
In this guide, we will show you the steps to enable VoLTE and VoWiFi on any OnePlus device. When we talk about wireless communications, Voice over LTE (4G) and Voice over WiFi are two of the newest entry in this list. For the unaware, this feature allows you to route your calls via carrier network or WiFi. The benefits?
Well, there are some places where the network connectivity is poor and hence users are unable to send or receive calls. In those cases, you might take the help of VoWiFi. Along the same lines, another pretty nifty benefit is that you would no longer have to carry out additional recharges for Talktime purposes. Taking note of the same, many OEMs have incorporated this feature onto their devices. However, with OnePlus, things are a bit strange.
While they have added this functionality onto their devices, but at the same time, have hidden it from normal users, for reasons best known to them. Anyways, the good news is that you could easily bring back this feature onto your device. And this guide shall show you how to do just that. So without further ado, let’s get started with the steps to enable VoLTE and VoWiFi on any OnePlus device.
- Enable VoLTE and VoWiFi on OnePlus via Function Switch
- Enable VoLTE and VoWiFi on OnePlus via PixelIMS
- Enable VoLTE and VoWiFi on OnePlus 11 via MBN File and Magisk [Root]
Enable VoLTE and VoWiFi on OnePlus via Function Switch
So here’s the thing. Your OnePlus device might already be having a newer and revamped version of the LogKit App. However, in the newer build, OnePlus has removed Function Switch- the feature through which you could enable the VoLTE and VoWiFi. Fortunately, I managed to get hold of the older version of the app that still has this feature! And it works on every OnePlus device. So let’s put it to the test right away.
- To begin with, download the (old) LogKit App onto your device: com.oem.oemlogkit_1.0-1.apk .
- Now launch the app and you would get the notification that whether you wish to install an update to this built-in app (although it’s a downgrade).
- So tap on Install and wait for it to be installed on your device. Once done, open the Dialer app on your device and type in the below code: *#800#
- This shall open the OnePlus LogKit app. Tap Enter in the Warning message that appears.
- Now scroll to the Function Switch option and tap on it to open it.
- Finally, enable the VoLTE and VoWiFi options and then reboot your device.
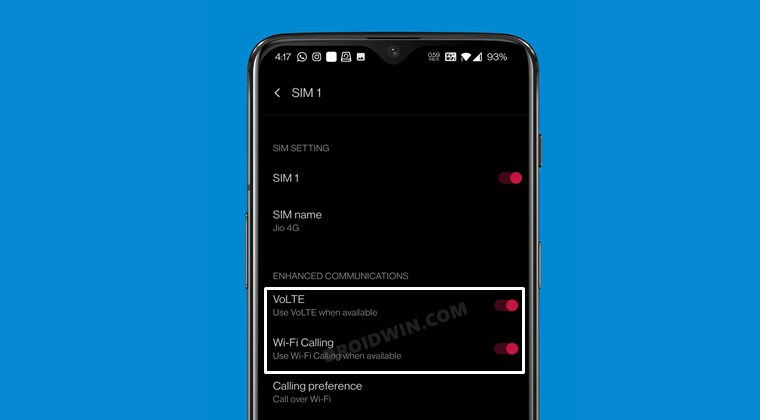
- Once it boots up, go to Settings > WiFi and Network > SIM & Network.
- Now select your active SIM from the list and enable the VoLTE and WiFi Calling toggle.
Enable VoLTE and VoWiFi on OnePlus via PixelIMS
UPDATE: Google has now patched the Pixel IMS app. But we have found a new method to bypass that restriction. You can find all the information about the same here: Google Patches Pixel IMS App | Here’s a New Method to Enable VoLTE and VoWiFi . [We are still preserving the old method below].

This is a non-root method that has been confirmed working on the latest OxygenOS 13 Android 13! Moroever, the entire credit for this tweak goes to the developer Kyujin Cho. With that said, you should verify if this tweak will work with your carrier or not from here . Even if your carrier is not listed, you could still give it a try as in rare cases, some users did manage to enable VoLTE on their carrier even though it was not listed there.
NOTE 1: If you have two SIMs, then disable SIM 2 and carry out the below steps on SIM 1 first. Once you have enabled VoLTE and VoWiFi on SIM 1, then disable this SIM 1. Then enable SIM 2 and carry out the same steps on this SIM 2 as well. Once done, you may now re-enable SIM 1 as well.

NOTE 2: If you have enabled "Disable Permission Monitoring" from the Developer Options, then please disable it beforehand, and only then proceed with the below steps.
- Download and extract Android SDK Platform Tools on your PC.
- Then download and install the Shizuku app from Play Store.
- Now go to Settings > System > About Phone > tap on Build Number 7 times.
- Then go to System > Developer options > enable USB Debugging.
- Now connect your device to your PC via a USB cable.
- Then open the Command Prompt inside the platform-tools folder and execute the below command: adb shell sh /sdcard/Android/data/moe.shizuku.privileged.api/start.sh
- You should now see Shizuku is running. Now download and install the PixelIMS app on your device.
- Now launch PixelIMS and tap on “Allow all the time” under the Shizuku prompt that appears.
- Then go to SIM 1 and enable the toggle next to Enable VoLTE and VoWiFi.
- Then restart the device for the changes to come into effect.
- Now launch the PixelIMS app and check out the IMS Status.
- If it shows Registered, then VoLTE is enabled on your OnePlus.
Enable VoLTE and VoWiFi on OnePlus 11 via MBN File and Magisk [Root]
This method has been successfully tested to work on the OnePlus 11.
- To begin with, download the required files from below: efstools-0.14 Pixel 4 mbn PDC VoLTEEnabler Magisk module Net 5.0 Framework , OnePlus USB Driver .
- Now install PDC, .Net 5.0 Framework , and OnePlus USB Drivers .
- Then replace mcfg_sw.mbn in efstools-0.14 folder with Pixel 4 MBN file.
- Now root your device and connect it to PC via USB cable.
- Then download and extract Android SDK Platform Tools.
- Now open Command Prompt window inside this folder.
- Then type in the below commands [you’ll get a SU request, hit Grant] adb shell su setprop sys.usb.config diag,serial_cdev,rmnet,adb
- Now open the Command Prompt inside the efstools-0.14 folder.
- Then type in the below command to backup your EFS partition: EfsTools.exe downloadDirectory -i / -o <replace_with_your_output_folder_name>
- Now type in the below command [it will trick your OnePlus 11 into believing it’s a Pixel 4]: EfsTools.exe writeFile -i mcfg_autoselect_by_uim -o /nv/item_files/mcfg/mcfg_autoselect_by_uim EfsTools.exe uploadDirectory -i mcfg_sw.mbn -o / -v
- Now launch Magisk, flash the VoLTE Enabler Module, and restart your device.
- Then enable VoLTE and/or VoWiFi from the SIM Info & Settings page.
- Now once again execute the below commands: adb shell su setprop sys.usb.config diag,serial_cdev,rmnet,adb
- Then run PDC, select device to load profiles, deactivate the current Activated profile, then activate GCI_Commercial for sub0 if your SIM is in slot 1, or sub1 if your SIM is in slot 2.
- Do note that you’ll have to run the last two steps every time you restart your device.
- How to Fix OnePlus Lag Issue after Android 11 Update
- How to Fix Qualcomm CrashDump Mode in OnePlus
- Enable Hidden DC Dimming on any OnePlus using ADB
- How to Enable Call Recorder on any OnePlus Device
- Enable and Use ADB Commands in OnePlus Stock Recovery

- Gavin 3 months ago Reply Won’t install, says conflicts with existing package.
- Shame 4 years ago Reply Apk won’t install
(Cancel Reply)
Δ
