How to Flash magisk_patched.tar (patched Samsung AP file) via Odin
In this guide, we will show you how to flash the magisk_patched.tar file (patched Samsung AP firmware file) via Odin. If you wish to make full use of your device, then the first requirement is an unlocked bootloader. Once you do so, you could install custom ROMs or custom recoveries such as TWRP, LineageOS Recovery, etc. Along the same lines, you could gain access to the system partition. This gaining of administrative rights is also known as rooting the device.
There are two different methods through which you could root any Android device. The first one is through the TWRP Recovery . On the other hand, the second method is without the use of TWRP. In this second method, many OEMs follow a straight forward route- patch the stock boot.img file via Magisk and then flash it via Fastboot Commands. However, straightforward and Samsung don’t really go hand-in-hand. The process with all Samsung devices is a tad different.
How to Pass Magisk SafetyNet on Rooted Android 11
Root Android 11 via Magisk Patched boot.img (without TWRP)
Fix Magisk patched boot.img issue while Rooting Android 11
Fix Android stuck in Recovery Mode: No Command screen
How to Flash magisk_patched.tar (patched Samsung AP firmware file) via Odin Read This Before Flashing magisk_patched.tar STEP 1: Install and Launch Odin STEP 2: Check for Ramdisk STEP 3: Download Samsung Stock Firmware STEP 4: Patch AP File via Magisk and get magisk_patched.tar STEP 5: Boot Samsung to Download Mode STEP 6: Install magisk_patched.tar via Odin
How to Flash magisk_patched.tar (patched Samsung AP firmware file) via Odin
The below instructions have been broken down into separate sections for ease of understanding. Follow along in the exact same sequence as mentioned.
Read This Before Flashing magisk_patched.tar
Since you are flashing the magisk_patched.tar AP file to obtain root, here are a few important points that desrveds your attention. Please go through these points first and only then mold you decision accordingly.
- You cannot unlock the bootloader of the North American (Canada and the USA) edition of Samsung devices. So rooting those devices is not possible.
- Rooting a Samsung device will wipe off all the data on your device. This is because the rooting process requires a CSC file and not the Home_CSC to be flashed via Odin.
- Many Knox-related features might no longer work even if you unroot your device.
- You will not be able to install OTA updates on a rooted Samsung. Your only course of action will be to download the entire firmware via Frija and SamFW, extract it, patch the AP, and then flash the entire firmware [patched AP, BL, CP, and Home_CSC/CSC] via Odin.
- While doing an update, you may use the Home_CSC instead of the CSC as a data wipe is not required in such cases.
- Never try to restore the boot, recovery, or vbmeta partitions back to stock. If there’s a need to get this job done, then you should always flash the entire firmware via Odin.
- Moreover, never just flash the patched AP for root as the Odin might shrink the size of the data partition. You should also flash BL, CP, and CSC along with patched AP to obtain root.
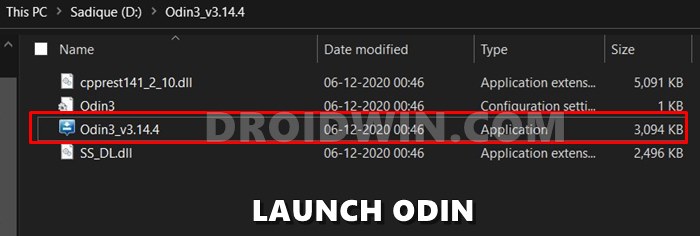
STEP 1: Install and Launch Odin
- To begin with, you will have to install Odin on your PC.
- If you haven’t done so, then download it from this link: Odin Tool .
- Then extract it to a convenient location on your PC.
- Double click on the Odin3_v3.14.4 EXE file to launch the tool.
STEP 2: Check for Ramdisk
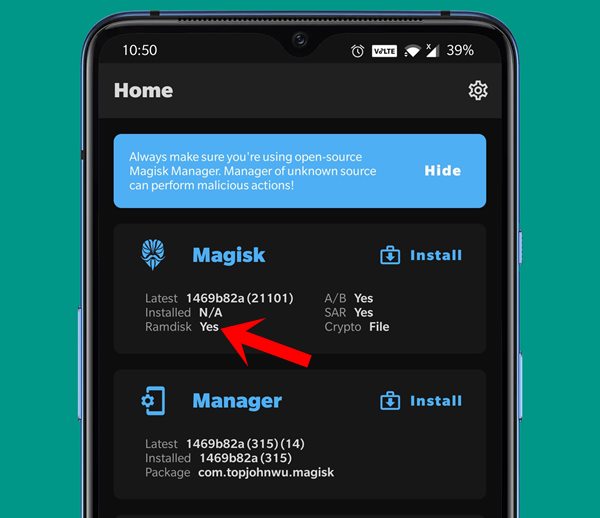
Next up, we would also suggest you check whether your Samsung device has ramdisk installed or not. [This process will come useful later on and doesn’t require root]. To do so, launch Magisk Manager on your device and see if it says YES or NO under Ramdisk. and remember it.
STEP 3: Download Samsung Stock Firmware
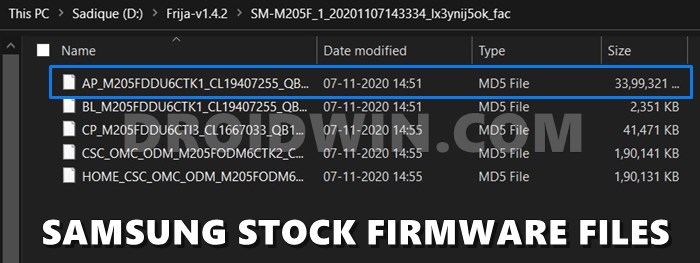
You should have downloaded the stock firmware for your device. If you haven’t done so, then please refer to our guide: How to Download Samsung Stock Firmware/ROM via Frija Tool . This should give you the following files in .tar.md5 format: AP, BL, CP, CSC, and HOME_CSC. We will be using ‘some’ of these files to flash the magisk_patched.tar file (patched Samsung AP firmware file) via Odin.
STEP 4: Patch AP File via Magisk and get magisk_patched.tar

Next up, you will have to patch the AP firmware file via Magisk and get the resultant magisk_patched.tar file. If you haven’t done so, then refer to our detailed guide on How to Patch Samsung AP Firmware via Magisk .
- Detailed Steps to Fix adb is not recognized Error
- Fix: pip is not recognized as an internal or external command
- How to Fix Unauthorized Device with ADB Commands [3 methods]
- How to Fix Error: Cannot load recovery.img
STEP 5: Boot Samsung to Download Mode
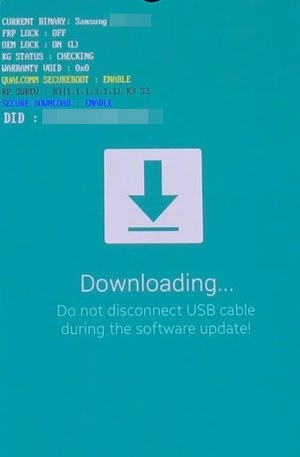
Also, boot your Samsung device to Download Mode. This is because the Odin Tool will be able to interact with your device only in this mode. You may refer to this guide to do so: How to Boot any Samsung Device to Download Mode .
That’s it. These were all the prerequisites. You may now proceed with the steps to flash the magisk_patched.tar file (patched Samsung AP firmware file) via Odin.
STEP 6: Install magisk_patched.tar via Odin
- First and foremost, transfer the magisk_patched.tar file to the folder where you have the other firmware files. Hence, the BL, CP, CSC, HOME_CSC, and the magisk_patched.tar files should all be present in one single folder. [We will load BL, CP, CSC, and magisk_patched.tar as mentioned in the below steps].
- Connect your Samsung device to the PC via USB cable. Make sure it is booted to Download Mode.
- Now launch the Odin Tool on your PC. Its’ time to load all the firmware files to this tool in order to flash the magisk_patched.tar file (patched Samsung AP firmware file) via Odin. So click on the BL button and upload the BL Firmware file. Next up, click on the AP button and upload the magisk_patched.tar. [Double check that you are uploading the patched AP file and not the stock one]. After this, click on CP and upload the CP firmware file. Finally, click on CSC and upload the CSC firmware file. [Double check that it is the normal CSC file and not the Home_CSC file].
- Once you have loaded all the files, go to the Options section of the Odin Tool. Uncheck the Auto Reboot option and then click Start (see below image).
- The flashing process shall now begin, and once completed you should see the green PASS message at the top left of the tool.
- When the flashing is complete, you may close the tool and remove your device from the PC. But don’t power it on yet, read the next point.
- If the Magisk check showed the Ramdisk as YES (under STEP 2: Check for Ramdisk), then you may use the power key to boot your device to the rooted OS.
- However, if it showed NO, then you will have to boot via a different method. First off, get hold of the hardware key combinations for your device that you use to boot to Recovery Mode (such as Power + Bixby + Volume Up for Galaxy S10). Once you got the keys combination, long-press it until the device boots up and you see the Bootloader Unlock Warning message. As soon as you that warning, release all the keys and you should be booted to the rooted OS with Magisk installed.
What did we do just know? Well if your device doesn’t have ramdisk, then Magisk has no choice but to install to Recovery/ hence we took the route of booting to the rooted OS via Recovery. If you wish to know more on this (highly recommended), then please refer to our comprehensive coverage on this topic: How to Boot Rooted Samsung to Recovery Mode and Rooted OS .
- How to Update Magisk ZIP and Magisk Manager (without TWRP)
- Fix Magisk Module Bootloop without TWRP Recovery
- [Update: Added Magisk 21] Everything About Magisk- Manager, Modules and More
- How to Fix TWRP Error 20 GApps after flashing LineageOS

- mohammed 4 years ago Reply i had a fail with this message on my download mode : “only official released binaries are allowed to be flashed” please any solution for that?
- Aadhil Kassim P N 4 years ago Reply Will this cause any kind of bootlooping even if done correctly? Is it mandatory to set auto reboot to unchecked as my device has ramdisk and no power button (its broken)?
- vic 4 years ago Reply trying to use joy con droid here , your guilde really helped
- Garth 4 years ago Reply The magisk patched is not opening by odin when i click the AP and drag the patched magisk file there.
- john 4 years ago Reply what if my tar file doesn’t only contains AP and BL files and doesn’t have CSC or CP files?
- Shivank 5 years ago Reply Is it mandatory to flash CSC file instead of HOME_CSC file? I don’t want to loose any files. Sadique Hassan 5 years ago Reply Hi Shivank, unfortunately flashing the CSC file is the only way out. Andrei 4 years ago Reply Salut am un Samsung note 20 și am o problema cu el mia funcționat o zi și după aceia nu mai are semnal și nici imei ce îi pot face
(Cancel Reply)
Δ
