How to Install TWRP and Root Samsung Galaxy S20 FE 5G
In this guide, we will show you the steps to install the TWRP Recovery and then root the Samsung Galaxy S20 FE 5G. When it comes to flagships, there’s no denying the fact that the offering from the South Korean giants has always been right there at the top. And the twentieth iteration in this series was no exception either.
The top of the end specs sheet, coupled with an impressive display and camera quality, managed to grab quite a lot of attention. However, some users were of the notion that all three devices in this segment were priced a tad higher. Well, the OEM paid heed to these views and hence launched its own flagship killer in the form of the Fan Edition.
Not only does it hold a decent feature set, but it has also proven to be quite an active player in custom development. Be it for flashing a custom recovery or gaining administrative privileges, there’s a lot to try out. And this guide shall make you aware of just that. So without further ado, let’s get started with the steps to install TWRP Recovery and root the Samsung Galaxy S20 FE 5G.
UPDATE: Sky Hawk Recovery Project is now live. The guide is updated with its flashing instructions as well. So which one should you opt for? Well, the choice is all yours, I’ll personally still go with TWRP.
- Perks and Risks of TWRP and Root
- How to Install TWRP and Root Samsung Galaxy S20 FE 5G STEP 1: Unlock the Bootloader on Galaxy S20 FE 5G STEP 2: Boot Samsung Galaxy S20 FE 5G to Download Mode STEP 3: Install Odin STEP 4: Disable Android Verified Boot on Samsung Galaxy S20 FE 5G STEP 5: Download Magisk App STEP 6: Download TWRP Recovery for Samsung Galaxy S20 FE 5G STEP 7: Install TWRP Recovery on Samsung Galaxy S20 FE 5G STEP 8: Remove Encryption STEP 9: Root Samsung Galaxy S20 FE 5G via Magisk
- FAQ 1: Missing Magisk ZIP on Internal Storage?
Perks and Risks of TWRP and Root
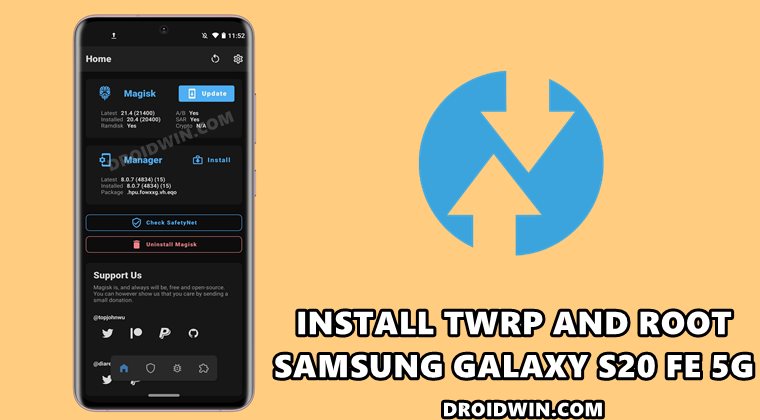
Once you have installed the TWRP Recovery, you could then flash a plethora of mods and ZIPs onto your device. Along the same lines, you could also take a backup of all the partitions on your devices via its Nandroid Backup feature. Then if you root your device via Magisk, you would have gained access to the system partition. Consequently, you could try out a plentitude of mods, including the likes of Magisk Modules , Viper4Android, Xposed Framework , Substratum Themes among others.
However, these tweaks come with a few risks as well. First off, the process requires an unlocked bootloader. Doing so will wipe off all the data and could nullify the warranty as well. Likewise, Knox will also be tripped which will result in the inability to use banking apps. Likewise, Netflix WideVine L1 will be degraded to L3 , hence Full HD resolution might not be supported. If all this is well and good, then let’s proceed ahead with the steps to install TWRP Recovery and root Samsung Galaxy S20 FE 5G.
How to Install TWRP and Root Samsung Galaxy S20 FE 5G
The below instructions are listed under separate sections for ease of understanding. Make sure to follow in the exact same sequence as mentioned. Droidwin and its members wouldn’t be held responsible in case of a thermonuclear war, your alarm doesn’t wake you up, or if anything happens to your device and data by performing the below steps.
Supported Devices: Galaxy S20 FE 5G G7810, G781B, G781N, G781U, G781U1, and G981W. NOTE: If you just wish to install TWRP Recovery but don’t want to root your device, then only carry out STEPS 1 to 8 [leave the last STEP 9, oh and yes, you can also leave STEP 5].
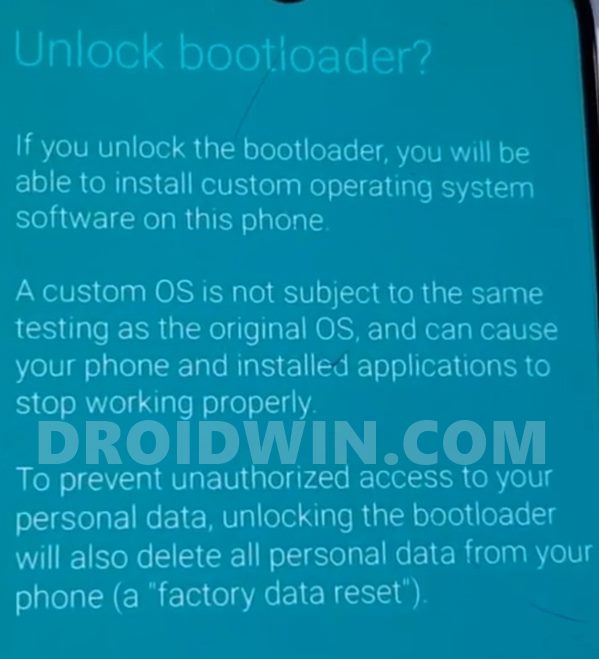
STEP 1: Unlock the Bootloader on Galaxy S20 FE 5G
First and foremost, you will have to unlock the bootloader on your device. For that, you may refer to our comprehensive guide on How to Unlock the Bootloader on Samsung Galaxy S20 Series [New VaultKeeper Method] . Once the process is complete and your device boots up, don’t restore the data yet, as your device will again have to go for a wipe in the subsequent step.
STEP 2: Boot Samsung Galaxy S20 FE 5G to Download Mode
You will have to boot your device to Download Mode so that you are able to flash the required mods. So either refer to our detailed guide on How to Boot any Samsung Device to Download Mode or refer to the below shorter instructions:
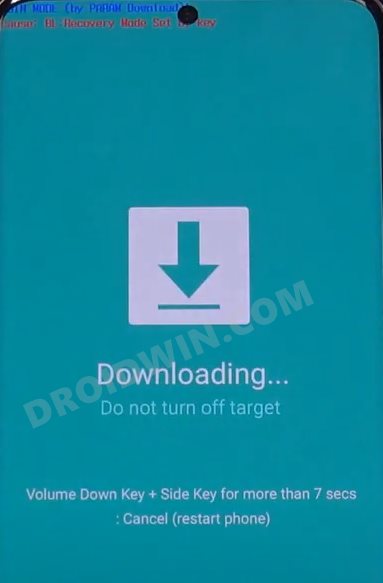
- To begin with, power off your device.
- Then press and hold the Power and Volume Up keys and your device will be booted to Stock Recovery.
- Now highlight the Reboot to Bootloader option using Volume keys and then press the Power key to confirm it.
- Your device should now boot to the Download Mode.
STEP 3: Install Odin
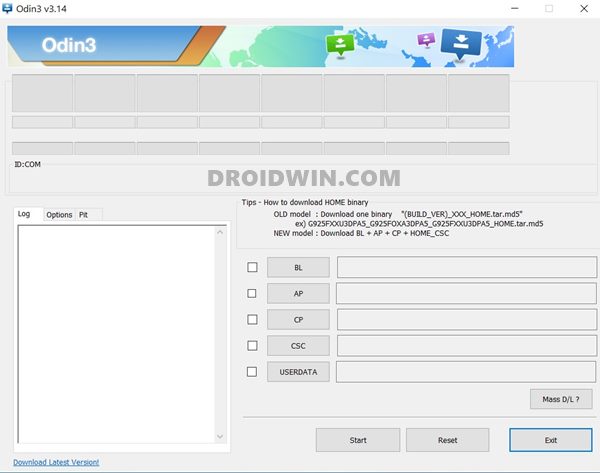
STEP 4: Disable Android Verified Boot on Samsung Galaxy S20 FE 5G
Next up, you will have to disable AVB on your device which would then allow you to flash the desired custom binary (in this case, TWRP and Magisk).
- So start off by downloading the vbmeta_disabled.tar file onto your PC.
- Now connect your device to the PC via USB cable (make sure that it is booted to Download Mode)
- Then launch the Odin Tool and click on the Userdata button.
- Navigate to the vbmeta_disabled.tar file, select it and click Open.
- Finally, click on the Start button. You shall now get a prompt on your device, stating that “You have to reset your device to factory settings”.
- So use the Volume Keys to select the reset option and hit the Power key to confirm it.
Your device will now undergo a reset and then, the AVB stands disabled. You may now proceed ahead to install the TWRP Recovery and root Samsung Galaxy S20 FE.
STEP 5: Download Magisk App
Next up, download the Magisk APK file. This will be used to root your Samsung Galaxy S20 FE device. So download it from the below link and then rename the APK to ZIP (i.e change the file extension from APK to ZIP). This will make the file TWRP flashable. Once you have made it a ZIP file, transfer it to your device as well (SD is recommended ).
- Download: Latest Magisk APK
STEP 6: Download TWRP Recovery for Samsung Galaxy S20 FE 5G
You could now grab the latest custom recovery for your device from the below link.
- Official TWRP Galaxy S20 FE 4G/5G [r8q]
Download Sky Hawk Recovery Project
Details:

Version: v3.2

Based On: TWRP 3.7.0_12-0

Build Date: 04/11/2025

Build Type: Unofficial


Bugs:

- MTP (Broken)

- Decryption (Disabled)


Notes:

- USB OTG works fine

- SDcard Support included

- The app instalation and the other minor /data issues that happened with newer kernels like not-kernel and calamity are now fixed in OneUI roms

- Nuked all add-ons


Credits:

@ata_kaner and @er_orn


Download

Link
STEP 7: Install TWRP Recovery on Samsung Galaxy S20 FE 5G
NOTE: Flashing Steps are same for TWRP and SkyHawk.
- Launch the Odin Tool on your PC and click on the AP button.
- Navigate to the downloaded TWRP.tar file, select it and click Open.
- Finally, hit the Start button and TWRP will be flashed onto your device.
- Now use the hardware key combinations to boot your device directly to TWRP.
STEP 8: Remove Encryption
- Now from recovery, go to Wipe > Advanced Wipe > checkmark: DATA, METADATA, KEYDATA, and KEYREFUGE
- Then perform a right swipe to wipe them.
- Once done, you’ll have to format the device. So go to Wipe and select Factory Reset.
- Then type in YES in the space provided and tap on the checkmark situated at the bottom right.
- Once the format is complete, you will have to reboot the device to TWRP. So go to Reboot and select Recovery.
STEP 9: Root Samsung Galaxy S20 FE 5G via Magisk
- It’s now time to flash Magisk and root your device (if you can’t find the Magisk ZIP on your device, then refer to FAQ 1).
- So go to Install, select the Magisk ZIP and perform a right swipe to flash it.
- Once Magisk has been flashed, you may reboot the device to the OS.
- So go to Reboot and select System. Your device will now boot up to the rooted OS!
If for some reason you had placed Magisk ZIP to the Internal Storage, then it would have been deleted due to the Factory Reset that we had just performed. So you will have to again transfer the file to your device (you could do the same from TWRP itself).
For that, you may refer to our detailed guide: [3 METHODS] How To Transfer or Install Files via TWRP Recovery . On the other hand, if you have placed the Magisk ZIP onto the SD Card, then the file would be preserved as it is, and you wouldn’t have to carry out this task.

- Glaedr Ross 4 years ago Reply Hi, is this good for SM-G780G?
(Cancel Reply)
Δ
