How to Root OnePlus 10 Pro via Magisk Patched Boot.img
In this guide, we will show you the steps to root your OnePlus 10 Pro device via Magisk patched boot.img. The tenth iteration in the OnePlus lineup has just been released and the anticipation is already at an all-time high. With the likes of the latest Snapdragon 8 Gen 1 chipset, adaptive refresh rate from 1Hz to 120Hz, and 80W fast charging, there’s a lot to look forward to. On the flip side though, it would come with ColorOS 12.1 out of the box, and this would surely ruffle a few feathers.
But there is still one domain in which it always manages to excel- and that is custom development. Once you unlock the device’s bootloader and step into this domain, you will be in a position to flash customized ROMs/GSIs, custom recovery, or even gain access to the system partition by rooting your device. Doing so will then allow you to flash a plethora of mods and tweaks. So on that note, let’s get started with the steps to root your OnePlus 10 Pro device via Magisk patched boot.img.
- Benefits and Risks of Rooting OnePlus 10 Pro
- How to Root OnePlus 10 Pro via Magisk Patched Boot STEP 1: Install Android SDK STEP 2: Enable USB Debugging and OEM Unlocking STEP 3: Unlock Bootloader on OnePlus 10 Pro STEP 4: Download OnePlus 10 Pro Firmware STEP 5: Extract OnePlus 10 Pro Payload.bin STEP 6: Patch OnePlus 10 Pro Boot via Magisk STEP 7: Boot OnePlus 10 Pro to Fastboot Mode STEP 8: Flash Patched Boot, Vendor_Boot, and Stock Vbmeta | Root OnePlus 10 Pro
- FAQ: Fastboot Boot vs Fastboot Flash for Root
- How to Fix OnePlus 10 Pro Stuck in Bootloop after Root
Benefits and Risks of Rooting OnePlus 10 Pro
Once you root your device, you will be in a position to flash a plethora of mods. These include the likes of Fox Magisk Modules , Substratum Themes , Xposed Framework via LSPosed , Viper4Android among others. Along the same lines, you could also flash a custom kernel and implement your desired CPU profile. However, such tweaks do come in with a few risks as well.
To begin with, rooting requires you to unlock the bootloader- which will wipe of all the data and could nullify the warranty as well. Likewise, SafetyNet will be triggered [ FIXED ] which will result in your inability to use banking apps [ FIXED ]. So if all that’s well and good, then let’s get started with the steps to root your OnePlus 10 Pro via the Magisk patched boot.img file.
How to Root OnePlus 10 Pro via Magisk Patched Boot

The below instructions are listed under separate sections for ease of understanding. Make sure to follow in the exact same sequence as mentioned. Droidwin and its members wouldn’t be held responsible in case of a thermonuclear war, your alarm doesn’t wake you up, or if anything happens to your device and data by performing the below steps.
STEP 1: Install Android SDK

First and foremost, you will have to install the Android SDK Platform Tools on your PC. This is the official ADB and Fastboot binary provided by Google and is the only recommended one. So download it and then extract it to any convenient location on your PC. Doing so will give you the platform-tools folder, which will be used throughout this guide.
STEP 2: Enable USB Debugging and OEM Unlocking
Next up, you will have to enable USB Debugging and OEM Unlocking on your device. The former will make your device recognizable by the PC in ADB mode. This will then allow you to boot your device to Fastboot Mode. On the other hand, OEM Unlocking is required to carry out the bootloader unlocking process.
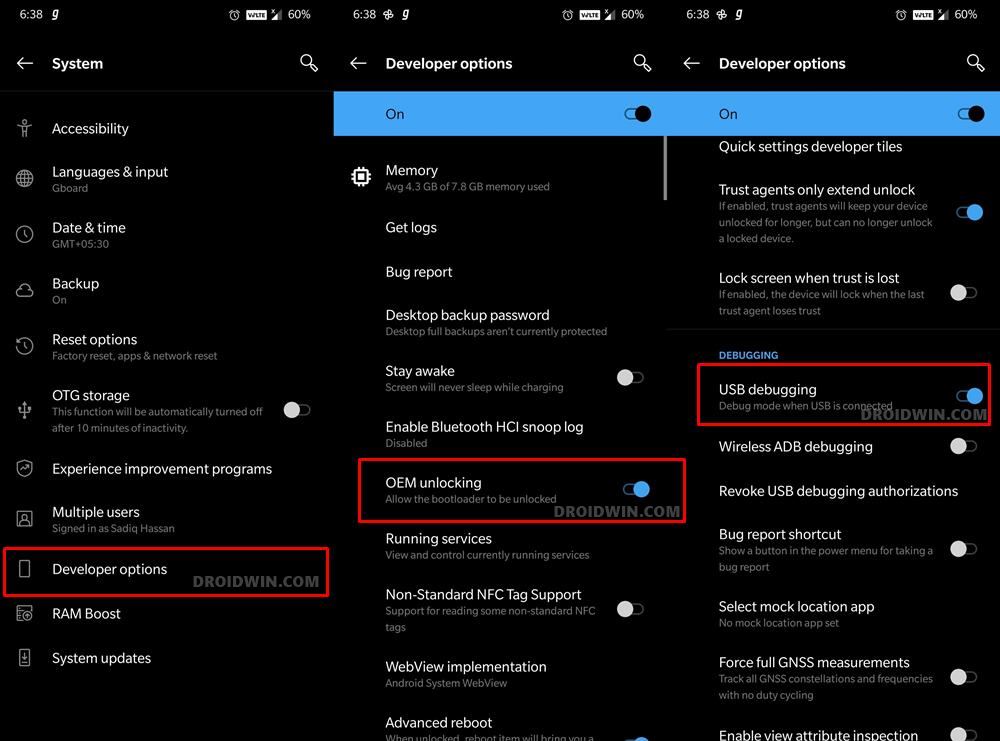
So head over to Settings > About Phone > Tap on Build Number 7 times > Go back to Settings > System > Advanced > Developer Options > Enable USB Debugging and OEM Unlocking.
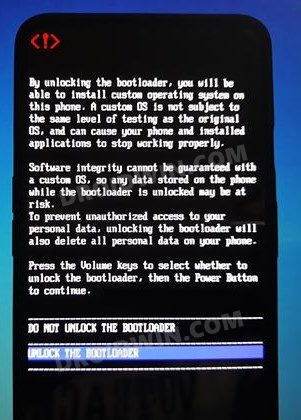
STEP 3: Unlock Bootloader on OnePlus 10 Pro
After this, you will have to unlock the bootloader on your OnePlus 10 Pro. Do keep in mind that this process will wipe off all the data and might nullify the device’s warranty as well. So if that’s all well and good, then refer to our comprehensive guide on How to Unlock Bootloader on OnePlus 10 Pro .
STEP 4: Download OnePlus 10 Pro Firmware
Next up, download the stock firmware for your 10 Pro from the OnePlus official website. If it hasn’t been uploaded there yet, then you could also use the direct server links that we have shared below [credits: XDA Recognized Developer steve0007 ]:
- ColorOS 12.1 A.09: Download Link
- ColorOS 12.1 A.08: Download Link
- ColorOS 12.1 A.07: Download Link
NOTE: I’m currently on ColorOS 12.1 A.08. If you are also on the same build number, then you may directly download the required files from below. As a result, you wouldn’t need to download the entire firmware or extract its payload bin file. So you may easily skip STEP 4 and STEP 5.
- boot_OnePlus_10_Pro_ColorOS_12.1_A.08_Droidwin.img
- vbmeta_OnePlus_10_Pro_ColorOS_12.1_A.08_Droidwin.img
- vendor_boot_OnePlus_10_Pro_ColorOS_12.1_A.08_Droidwin.img
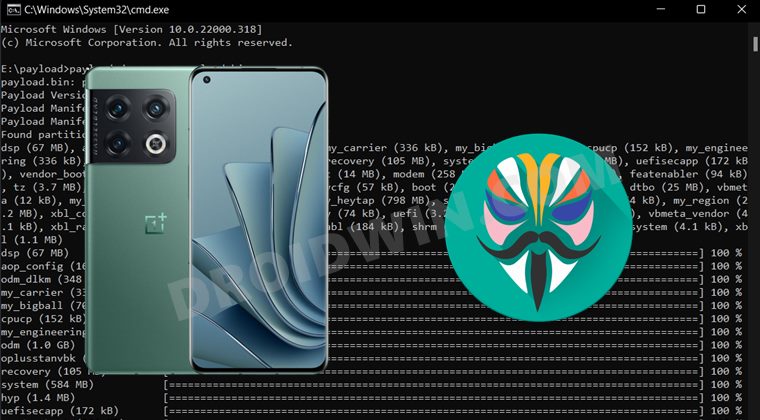
STEP 5: Extract OnePlus 10 Pro Payload.bin
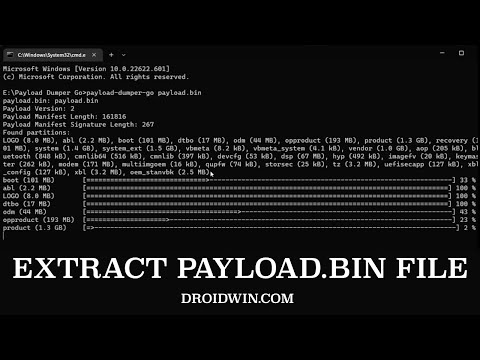
- Once you have downloaded the firmware, extract it to any convenient location on your PC. Doing so shall give you a couple of files, including the payload.bin.
- For the unaware, OnePlus packs all its partition IMG files inside this payload.bin file, so you will have to extract it first. For that, you may refer to our guide on How to Extract payload.bin and get the stock boot image file .
- Once the extraction is complete, transfer the boot.img file to your device.
STEP 6: Patch OnePlus 10 Pro Boot via Magisk
- Download and install the latest Magisk APK onto your device.
- Then launch it and tap on the Install button next to Magisk.
- After that, choose ‘Select and Patch a File’, navigate to the stock boot.img file, and select it.
- Then tap on the Let’s Go button situated at the top right.
- The boot.img file will now be patched and placed under the Downloads folder on your device.
- The boot.img file will now be patched and placed under the Downloads folder on your device. You should transfer this file to the platform-tools folder on your PC. We will now be using this file to root your Pixel 6 device.
STEP 7: Boot OnePlus 10 Pro to Fastboot Mode
- Connect your device to the PC via USB cable. Make sure USB Debugging is enabled.
- Then head over to the platform-tools folder, type in CMD in the address bar, and hit Enter. This will launch the Command Prompt.
- Type in the following command in the CMD window to boot your device to Fastboot Mode adb reboot bootloader
- Now type in the below command to verify the Fastboot Connection fastboot devices
- If you get a device ID followed by the fastboot keyword, then the connection stands successful. You may now proceed to the next step to root your OnePlus 10 Pro via Magisk Patched Boot.
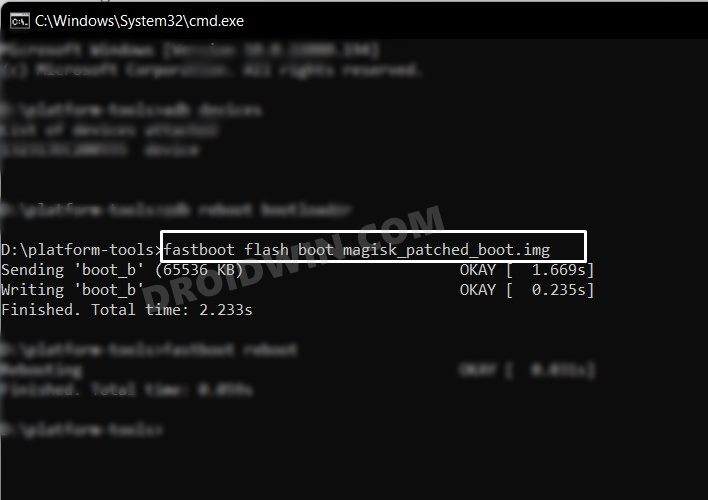
STEP 8: Flash Patched Boot, Vendor_Boot, and Stock Vbmeta | Root OnePlus 10 Pro
- To begin with, boot your device using the Magisk patched boot.img file: fastboot boot magisk_patched.img
- Now launch the Magisk app and tap on the Install button next to Magisk.
- Then select Automatic Installation (or Direct Installation) and wait for the process to complete.
- Once done, tap on the Reboot button that appears at the bottom right. Your device will now boot to the rooted OS
Before we conclude this guide, there’s an important point worth discussing. There exist two different methods through which you could root your device- either by first booting the magisk patched boot to obtain temporary root and then using the Magisk Direct Install to permanent root OR by directly flashing the magisk patched boot.img. It is always recommended that you opt for the former approach [temporary root].
This is because in case something goes wrong [say, you have used an incorrect boot.img file] and you had done temporary root, then simply restarting your device would replace the patched boot with stock boot and this will fix the bootloop issue within seconds. On the other hand, if you had permanently rooted and something went wrong, then upon restating, it will still have the corrupt patched boot [since you had permanently installed it].
So you will then have to manually flash the stock boot.img or in some cases, the entire payload.bin via Fastboot Commands. Apart from that, temporary root has many other benefits. For example, if you need to test a module for just a one-time usage, then you could temporarily create a rooted environment, try out that mod, and then restart your device to remove the root! Owing to all these benefits, we used the temporary boot method to root your OnePlus 10 Pro via Magisk.
How to Fix OnePlus 10 Pro Stuck in Bootloop after Root
If your OnePlus 10 Pro is stuck in a bootloop, then you just need to flash the stock boot, stock vbmeta, and stock vendor_boot files using the below commands and your device will boot to the OS without any issues.
fastboot flash boot boot.img

fastboot flash vbmeta vbmeta.img

fastboot flash vendor_boot vendor_boot.img

fastboot reboot
- How to Hide Root from Apps via Magisk DenyList [Android 12/13]
- How to Remove Navigation Bar Gesture Pill on Android 12 Without Root
- Guide to Pass SafetyNet on Rooted Android 12/Android 13
- How to Pass SafetyNet test after installing Xposed or EdXposed

- Parku 3 years ago Reply fastboot boot magisk_patched.img sending ‘boot.img’ (47432kb) FAILED (Write to device failed in send buffer) (No link)) fastboot: error: command failed. this is what i keep getting. any reason on this error and how to fix it?
- pablo 3 years ago Reply I have a bricked OP10 pro phone, where can i find boot.img vbmeta e vendor img???
- Si 3 years ago Reply So, we don’t have to flash vbmeta and vendor_boot anymore? I see those steps missing in the page now. Last time I rooted, I remember having flashing vendor_boot image too along with boot image. Sadique Hassan 3 years ago Reply Hi Mate, many users have reported that they are “now” able to root their OnePlus 10 Pro without the need for vendor_boot and vbmeta. While currently, I’m not in a position to test it out, if you are willing to, please let us know the results as well. To be on the safer side, it is recommended to try the fastboot boot instead of the fastboot flash. If your device boots up, you may then permanently root via Direct Install. if it is stuck in bootloop. then force boot to Fastboot Mode and flash the stock boot to fix the bootloop. The next time you try to root, then after the fastboot boot magisk_patched_boot.img command, you could flash the vendor_boot and disable dm-verity [by flashing vbmeta] and then check out the results. Si 3 years ago Reply I rebooted in fastboot flashed disable dm-verity with vbmeta and also flashed patched vendor boot. Root is intact. phone boots up, works fine. But the ORANGE STATE won’t go off during boot. What should I do to clear this off. Is it because the phone updated via the incremental patch and hence the vbmeta is not working. If that is the case, reinstalling via local update (the full OTA) would work or will it brick the device? Please help me with this. Sadique Hassan 3 years ago Reply Hi Si, thanks for confirming the results. Regarding the Orange State warning, could you let me know the error message that it displays? Is it “Orange State…Your device has been unlocked and can’t be trusted…Your device will boot in 5 seconds…” Si 3 years ago Reply Thank you for the responses. Rooting and everything worked fine. Only problem is the orange state message that started popping up everytime I restart the phone. Yes, the error message that you mentioned is the one that is getting displayed during boot Orange State…Your device has been unlocked and can’t be trusted…Your device will boot in 5 seconds… If my assumptions are right and correct me if I am wrong. Is it because I flashed the patched images on an incremental update? I could not flash the full zip through local install and hence chose to go ahead with the incremental OTA update. Could that be causing the Orange State problem? If yes, can I flash the full zip via local install and go through the dm-verity and magisk boot patch process? I hope doing so would not cause any issue or brick the device. Awaiting your clarification on this. Once again thank you for your replies and clarifications. You have been a saviour!!!!! Si 3 years ago Reply I do have one more question. Though I had the ROM file downloaded from Oxygen Updater. The phone automatically installed the incremental update. In this case, would flashing vendor_boot and vbmeta be a problem? Now that I have already done a fastboot boot patched boot image, is it safe to flash the other 2 files with the below commands. fastboot flash magisk_patched-vb.img fastboot –disable-verity –disable-verification flash vbmeta vbmeta.img Are the commands correct and is it the correct order? Sorry to be bombarding you with so many questions Sadique Hassan 3 years ago Reply Sorry for the delay in response. Judging. by your subsequent response, I guess you were able to rectify this concern. If not, then do let me know. Si 3 years ago Reply Yes, I was ableto root the phone without vendor_boot and Vbmeta. However, I now get the message Orange State Your devices has been unlocked and can’t be trusted Your devices will boot in 5 seconds The phone boots fine after this message is displayed for about 20 seconds. Is this due to dm verity? if I need to flash vbmeta and disable verification, how should I do it. Now that root is done and phone is working well , it still is annoying and creates an anxiety when the phone displays the message orange state Please help me with the dm-verity command and if I can use that after all the flashing is done. I hope I am understandable Sadique Hassan 3 years ago Reply Again, thanks for the confirmation mate. Regarding disabling vbmeta, any of these three commands should work: fastboot flash vbmeta –disable-verity –disable-verification vbmeta.img fastboot –disable-verity –disable-verification flash vbmeta vbmeta.img fastboot flash vbmeta vbmeta.img –disable-verity –disable-verification Si 3 years ago Reply fastboot flash –disable-verity –disable-verification vbmeta vbmeta.img Will this command work? And is it necessary to flash vendor_boot_patched image too?
- hushyar 3 years ago Reply hello dear Sadique Hassan I used this method to root my oneplus 10 pro on oxygen OS 13 and now it is stuck on QUALCOMM crashDump mode bootloader is open and it gets into fastboot mode but when I want to flash stock rom with Fastboot Enhance tool it will not reboot into fastbootD mode. kindly, can you help me. seb 3 years ago Reply Hello, same problem for me, did you solve it?
- x-3o3 3 years ago Reply Does booting the magisk patched boot.img and then “direct install” magisk still work with the new Android 13 Update? Any experiences right now? Thank you <3 Sadique Hassan 3 years ago Reply Yes mate, the Direct Install still works with Android 13.
- Si 4 years ago Reply How do I go about this. Please guide
- Vishal Ranjan Mallick 4 years ago Reply Thanks, its don
(Cancel Reply)
Δ
