How to Run Airtel Thanks app on Rooted Device
In this guide, we will show you the steps to run the Airtel Thanks app on your rooted device. Banking and payment apps refusing to work on a rooted device is a well-known fact. However, they are not the only ones out there. The likes of Uber, McDonald’s, and Pokémon Go have also made life quite difficult for tech enthusiasts. And now, you can add an app from a popular Indian carrier.
The Airtel app is just refusing to work for numerous users who have rooted their devices. According to them, they have tried all the plausible tweaks, but the app is somehow still able to detect root and force closes right at the first screen [where you enter the phone number]. If you’re also facing a similar issue, then this guide will help you run the Airtel Thenaks app on your rooted Android device. Follow along for the steps.
How to Run Airtel Thanks app on a Rooted Device

Before starting, take a complete device backup, just to be on the safe side. Droidwin and its members wouldn’t be held responsible in case of a thermonuclear war, your alarm doesn’t wake you up, or if anything happens to your device and data by performing the below steps.
If you’re currently on a custom ROM, then make sure to root it first [recommended is Magisk]. Moreover, I’ll be using the official Magisk app for this task [not the Alpha or Kitsune]. [UPDATE: It seems Airtel is able to detect the official Magisk app, so I have switched over to Magisk Alpha . The guide, along with the screenshots, has been updated to reflect the same]. While you can use KernelSU or APatch, you wouldn’t be able to carry out the first two steps [which is quite obvious, but still I thought of mentioning it here]. So, keeping all these points in mind, let’s get started.
- First off, launch Magisk Alpha > go to Settings > Hide the Magisk app.
- Now go to Configure Denylist and enable the toggle next to these apps Google Play Services Google Play Store Google Services Framework Airtel Thanks
- Now, create a blacklist using Hide My Applist and apply it to the Airtel Thanks app.
- Then pass at least the Device Integrity , though the Strong will be the best.
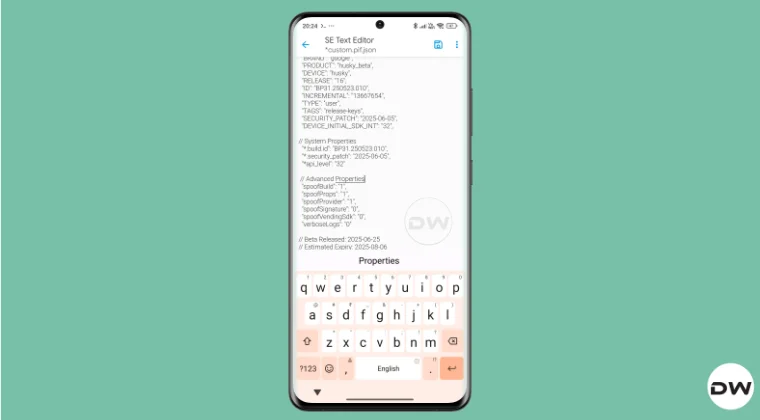
- Also, create a custom.pif.json file .
- Now go to the below location and open the target.txt file: data/adb/tricky_store/target.txt
- Then add its app package name [in.gov.uidai.pehchaan] in that text file and save it.
- After that, spoof your device’s bootloader status to Locked [make sure to check the Airtel Thanks app].
- Next, delete the data of Google Play Service, Google Play Store, Google Service Framework, and the Airtel Thanks app.
- Finally, restart your device and check out the result. You’ll now be able to use the Airtel Thanks app without any issues.
- How to Root Android using Magisk Alpha [And Why You Should]
- Will Rooting a Custom ROM Fail Strong Integrity? Let’s Find Out!
- How to Install Incompatible or Old App on Android [Without Root]
- How to Use Secure Folder on Rooted/Unlock Bootloader Samsung!
- Root via AnyKernel and Magiskboot [Without Patching Init_Boot]

(Cancel Reply)
Δ
How to Get Fingerprint PIF.JSON File using Play Integrity Fork
In this guide, we will show you the steps to get the fingerprint PIF.JSON file using Play Integrity Fork. A week back or so, we got the unfortunate news that the Play Integrity Fix module has been discontinued by the developer chiteroman. We can’t thank him enough for the invaluable work he has done for this community. But going forward, what can be our next course of action?
Well, while this module was up and running, another developer [osm0sis] was also running a fork of this module, which goes by the name Play Integrity Fork. While we wouldn’t say that it was under the shadow of Fix, but it wasn’t being used that much when compared to its counterpart.

However, all that is about to change now, and so there are a few queries that might pop up in your minds. In this regard, one of the most common questions that I have been asked for the past week is how to get the fingerprint PIF.JSON file in the Play Integrity Fork module.
As you might already be aware, the Fix module already has this embedded in its module; you just need to launch it via KSUWebUI, hit the Fetch PIF.JSON option, and you’ll get the file. But that’s not possible via the Fork module via the direct route. Why? Let’s find out, and after that, we will list the plausible steps through which you can get this file using this module. Follow along.
- Why is the PIF JSON Fingerprint File Missing in Play Integrity Fork
- How to Get the Fingerprint PIF.JSON File using Play Integrity Fork
- Direct Download PIF JSON Files
Why is the PIF JSON Fingerprint File Missing in Play Integrity Fork
By default, the module comes with a template of a PIF JSON file that you need to fill in manually. You can get this file from /data/adb/modules/playintegrityfix. Once you fill in the values, simply rename it to custom.pif.json, and your task stands complete. But why hasn’t the dev simply added this file, as was the case with the Fix module? Here’s what he has to say regarding this:
There’s intentionally no pif.json in the module because the goal remains to be futureproof, and including something that may be banned and obsolete within days would be contrary to that goal.

However, finding these files might not be everyone’s cup of tea. Not only are a few of these remains, but finding them is also quite an effort taking task. The developer acknowledges this, and hence, he has added a script to extract the latest Pixel Beta fingerprint along with the module. The script is named autopif2, which generates a random device fingerprint from the latest Pixel Beta. So let’s have a look at the steps to make full use of this file.
How to Get the Fingerprint PIF.JSON File using Play Integrity Fork

Before starting, please take a backup of all the data on your device, just to be on the safe side. Droidwin and its members wouldn’t be held responsible in case of a thermonuclear war, your alarm doesn’t wake you up, or if anything happens to your device, and data by performing the below steps.
NOTE: There are quite a few ways of getting this job done, however, I personally found Termux to be the easiest among all of them. But if you want to try out any other method, then run the generation script from a root manager app that supports the module Action button or from a file explorer app that supports script execution.
- To begin with, flash the wget2 module via Magisk / KernelSU / APatch .
- Then, flash the Play Integrity Fork CI module from GitHub Actions .
- Now, download and install the Termux app from F-Droid.
- Then launch it and execute the following three commands: su //you’ll get a SU request, hit Grant cd /data/adb/modules/playintegrityfix //to change the directory to the module’s sh autopif2.sh –preview // this will give you the fingerprint file
- You can also add a few other parameters to the above command, namely: su -c sh /data/adb/modules/playintegrityfix/autopif2.sh -a -m -p -s -a Advanced -m Match -p Preview -s Strong
- Once done, head over to the below location to access the custom.pif.json /data/adb/modules/playintegrityfix
Direct Download PIF JSON Files
If you don’t want to manually carry out the aforementioned steps, then you may directly get the PIF JSON file from our below guide:
Download PIF JSON File from Here
- How to Pass Strong Integrity Using Revoked/Banned Keybox File!
- How to Pass Play Integrity in New Android 13+ Checks
- Guide to Pass Strong Integrity on Unlocked Bootloader & Root!
- How to Spoof/Fake/Hide Bootloader Unlock Status
- How to Pass Play Integrity Test on any Custom ROM [Video]
- Drw 6 months ago Reply Problem solved. Termux wasn’t prompting me to grant su user access. Found where to enable it in the KSU Next GUI under Superuser.
- Drw 6 months ago Reply I’m getting “su program not found.” Rooted with ksu and susfs. Modules installed are BKI, Play integrity fork, shamiko, susfs for ksu, tricky store, wget2, zygisk lsposed, and zygisk next. Nothing tweaked.
- mario 7 months ago Reply sorry, what do you mean with “Then, flash the Play Integrity Fork CI module from GitHub Actions.” ? i have pif v13 flashed in magisk
- Mohamed 7 months ago Reply Hi, can you please help me with a vaild keybox pleaaase 🙏
- Antonis 7 months ago Reply 1) “Then, flash the Play Integrity Fork CI module from GitHub Actions” https://github.com/osm0sis/PlayIntegrityFork/actions what do i download? 2) and then what do i do with custom.pif.json ?
- Antonis 7 months ago Reply “Then, flash the Play Integrity Fork CI module from GitHub Actions” https://github.com/osm0sis/PlayIntegrityFork/actions what do i download?
(Cancel Reply)
Δ
