Install Android 13 on OnePlus 9 Pro via Fastboot Commands
In this guide, we will show you the steps to install Android 13 onto your OnePlus 9 Pro via Fastboot Commands. OnePlus have just rolled out the latest OS build for its ninth series. With that, there are a plethora of goodies that you are about to welcome abode onto your device. Some of the noteworthy ones include the new Aquamorphic Design, seamless interconnection among different devices, updates to the Gaming Engine, and a slew of new personalization options.
To install this build, the easiest way out is to directly head over to the device’s Settings menu and download the OTA. Or if you are a beta tester, yo could grab hold of the Beta Update ZIP package and perform a local upgrade. But while they are the easiest method, they might not be applicable in every scenario. For example, the update is rolled out in batches, and not everyone gets it in one go.
However, if you managed to get hold of the update firmware, then you could manually install it via Fastboot. Another important scenario is when your device ends up in a bootloop or soft brick state. When that happens, the only way to bring your OnePlus 9 Pro back to life is by flashing the Android 13 firmware via Fastboot Commands. So without any further ado, let’s get started with the instructions right away.
- How to Install Android 13 on OnePlus 9 Pro via Fastboot Commands STEP 1: Install Android SDK STEP 2: Download OnePlus 9 Pro Android 13 Firmware STEP 3: Extract OnePlus 9 Pro Payload.bin STEP 4: Unlock Bootloader on OnePlus 9 Pro STEP 5: Boot OnePlus 9 Pro to Fastboot Mode STEP 6: Flash OnePlus 9 Pro Android 13 Partition Files in Fastboot STEP 7: Boot to FastbootD Mode STEP 8: Flash OnePlus 9 Pro Android 13 Partition Files in FastbootD Mode
How to Install Android 13 on OnePlus 9 Pro via Fastboot Commands
The below instructions are listed under separate sections for ease of understanding. Make sure to follow the same sequence as mentioned. Droidwin and its members wouldn’t be held responsible in case of a thermonuclear war, your alarm doesn’t wake you up, or if anything happens to your device and data by performing the below steps.
STEP 1: Install Android SDK

First and foremost, you will have to install the Android SDK Platform Tools on your PC. This is the official ADB and Fastboot binary provided by Google and is the only recommended one. So download it and then extract it to any convenient location on your PC. Doing so will give you the platform-tools folder, which will be used throughout this guide.
STEP 2: Download OnePlus 9 Pro Android 13 Firmware
Next up, get hold of the stock firmware for your OnePlus 9 Pro device from the below link.
OnePlus 9 Pro Android 13 Firmware: Download Link
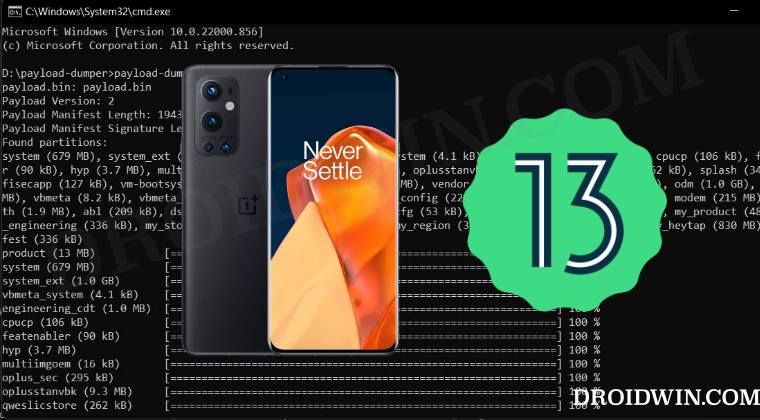
STEP 3: Extract OnePlus 9 Pro Payload.bin
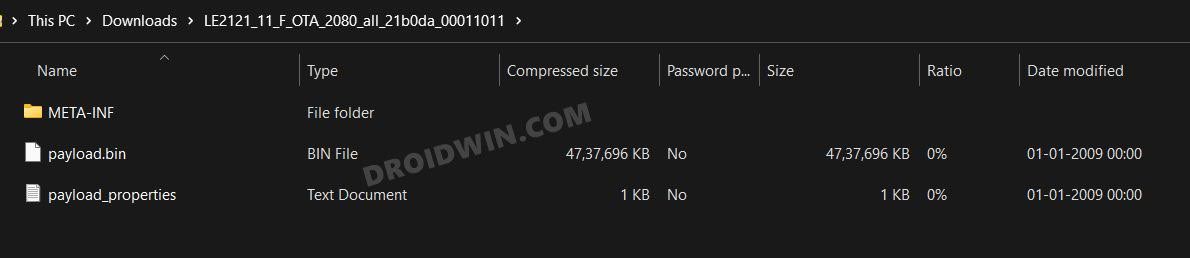
Once you have downloaded the firmware, extract it to any convenient location on your PC. Doing so shall give you a couple of files, including the payload.bin. And we will have to extract this file to get hold of all the partition files. So refer to our guide on How to Extract the OnePlus Payload.bin file.
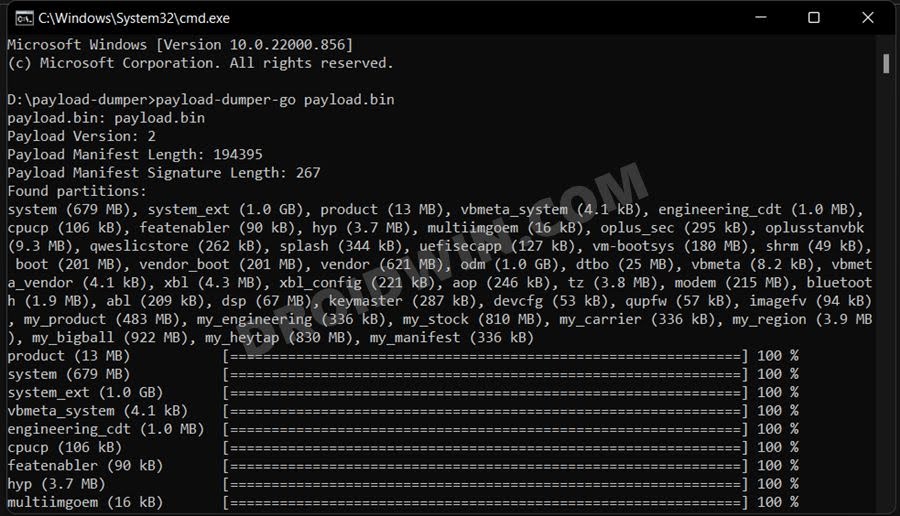
Once extracted, you will get the required partition files which you should transfer to the platform-tools folder.

STEP 4: Unlock Bootloader on OnePlus 9 Pro
You will also have to unlock the bootloader on your device. Do keep in mind that this process will wipe off all the data and might nullify the device’s warranty as well. So if that’s all well and good, then refer to our comprehensive guide on How to Unlock Bootloader on OnePlus 9, 9 Pro and 9R
STEP 5: Boot OnePlus 9 Pro to Fastboot Mode
- Connect your device to the PC via a USB cable. Make sure USB Debugging is enabled.
- Then head over to the platform-tools folder, type in CMD in the address bar, and hit Enter. This will launch the Command Prompt.
- Type in the following command in the CMD window to boot your device to Fastboot Mode adb reboot bootloader
- Now type in the below command to verify the Fastboot Connection fastboot devices
- If you get a device ID followed by the fastboot keyword, then the connection stands successful.
STEP 6: Flash OnePlus 9 Pro Android 13 Partition Files in Fastboot
Now execute the below commands in the CMD window that is opened in the platform-tools folder to flash the firmware files in Fastboot Mode. [If you get any errors, then do not leave the process midway, rather note down that error somewhere and then proceed ahead to execute the rest of the commands. Then try flashing that error-causing files in FastbootD Mode. See STEP 7 and 8 below].
fastboot flash boot boot.img

fastboot flash cpucp cpucp.img

fastboot flash dtbo dtbo.img

fastboot flash modem modem.img

fastboot flash oplusstanvbk oplusstanvbk.img

fastboot flash oplus_sec oplus_sec.img

fastboot flash qweslicstore qweslicstore.img

fastboot flash shrm shrm.img

fastboot flash splash splash.img

fastboot flash vbmeta vbmeta.img

fastboot flash vbmeta_vendor vbmeta_vendor.img

fastboot flash vbmeta_system vbmeta_system.img

fastboot flash vendor_boot vendor_boot.img

fastboot flash vm-bootsys vm-bootsys.img
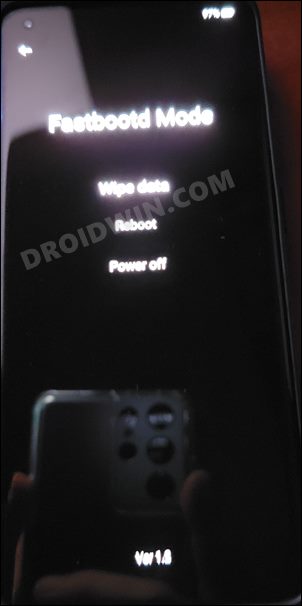
STEP 7: Boot to FastbootD Mode
You will now have to boot your device to the FastbootD Mode to flash the logical partition files. As of now, you will be in the Fastboot Mode, so execute the below command to directly boot to FastbootD Mode:
fastboot reboot fastboot
STEP 8: Flash OnePlus 9 Pro Android 13 Partition Files in FastbootD Mode
Now execute the below commands in the CMD window that is opened in the platform-tools folder to flash the rest of the firmware files in the FastbootD Mode. Moreover, the last command listed below [fastboot reboot] will automatically boot your device to the Android 13 OS.
fastboot flash abl abl.img

fastboot flash aop aop.img

fastboot flash bluetooth bluetooth.img

fastboot flash devcfg devcfg.img

fastboot flash dsp dsp.img

fastboot flash engineering_cdt engineering_cdt.img

fastboot flash featenabler featenabler.img

fastboot flash hyp hyp.img

fastboot flash imagefv imagefv.img

fastboot flash keymaster keymaster.img

fastboot flash multiimgoem multiimgoem.img

fastboot flash my_carrier my_carrier.img

fastboot flash my_engineering my_engineering.img

fastboot flash my_heytap my_heytap.img

fastboot flash my_manifest my_manifest.img

fastboot flash my_product my_product.img

fastboot flash my_region my_region.img

fastboot flash my_stock my_stock.img

fastboot flash odm odm.img

fastboot flash product product.img

fastboot flash qupfw qupfw.img

fastboot flash system system.img

fastboot flash system_ext system_ext.img

fastboot flash tz tz.img

fastboot flash uefisecapp uefisecapp.img

fastboot flash xbl xbl.img

fastboot flash xbl_config xbl_config.img

fastboot flash vendor vendor.img
- How to Root OnePlus 9, 9 Pro, 9R via Magisk
- Flash/Update Android 12 on OnePlus 9 Pro via Fastboot Commands
- How to Unbrick OnePlus 9/Pro via Fastboot Commands
- Convert OnePlus 9 Pro T-Mobile to EU via MSM Tool [Without unlock.bin]

- jkfx 3 years ago Reply ending ‘my_carrier’ (328 KB) OKAY [ 0.010s] Writing ‘my_carrier’ FAILED (remote: ‘No such file or directory’) fastboot: error: Command failed Sending ‘my_engineering’ (328 KB) OKAY [ 0.009s] Writing ‘my_engineering’ FAILED (remote: ‘No such file or directory’) fastboot: error: Command failed Sending sparse ‘my_heytap’ 1/5 (262140 KB) OKAY [ 7.303s] Writing ‘my_heytap’ FAILED (remote: ‘No such file or directory’) fastboot: error: Command failed Sending ‘my_manifest’ (396 KB) OKAY [ 0.011s] Writing ‘my_manifest’ FAILED (remote: ‘No such file or directory’) fastboot: error: Command failed Sending sparse ‘my_product’ 1/2 (262140 KB) OKAY [ 7.574s] Writing ‘my_product’ FAILED (remote: ‘No such file or directory’) fastboot: error: Command failed Sending ‘my_region’ (3676 KB) OKAY [ 0.099s] Writing ‘my_region’ FAILED (remote: ‘No such file or directory’) fastboot: error: Command failed Sending sparse ‘my_stock’ 1/8 (262140 KB) OKAY [ 7.675s] Writing ‘my_stock’ FAILED (remote: ‘No such file or directory’) reboot phone will stuck reboot bootloader mode loop.
(Cancel Reply)
Δ
